部署到 iOS 和 Android
¥Deploying to iOS and Android
由于我们在首次创建项目时将 Capacitor 添加到项目中,因此在我们的设备上安装照片库应用之前只需要执行几个步骤!请记住,你可以找到此应用 此处 的完整源代码。
¥Since we added Capacitor to our project when it was first created, there’s only a handful of steps remaining until the Photo Gallery app is on our device! Remember, you can find the complete source code for this app here.
Capacitor 设置
¥Capacitor Setup
Capacitor 是 Ionic 的官方应�用运行时,可以轻松地将 Web 应用部署到 iOS、Android 等原生平台。如果你过去使用过 Cordova,请考虑阅读有关差异 此处 的更多信息。
¥Capacitor is Ionic’s official app runtime that makes it easy to deploy web apps to native platforms like iOS, Android, and more. If you’ve used Cordova in the past, consider reading more about the differences here.
如果你仍在终端中运行 ionic serve,请将其取消。完成 Ionic 项目的全新构建,修复它报告的任何错误:
¥If you’re still running ionic serve in the terminal, cancel it. Complete a fresh build of the Ionic project, fixing any errors that it reports:
ionic build
接下来,创建 iOS 和 Android 项目:
¥Next, create both the iOS and Android projects:
$ ionic cap add ios
$ ionic cap add android
项目根目录下的 android 和 ios 文件夹均已创建。这些是完全独立的原生项目,应被视为 Ionic 应用的一部分(即,将它们签入源代码管理,使用其原生工具编辑它们等)。
¥Both android and ios folders at the root of the project are created. These are entirely standalone native projects that should be considered part of your Ionic app (i.e., check them into source control, edit them using their native tooling, etc.).
每次执行更新你的 Web 目录的构建(例如 ionic build)时(默认:build),你需要将这些更改复制到你的原生项目中:
¥Every time you perform a build (e.g. ionic build) that updates your web directory (default: build), you'll need to copy those changes into your native projects:
ionic cap copy
注意:更新代码的原生部分(例如添加新插件)后,使用 sync 命令:
¥Note: After making updates to the native portion of the code (such as adding a new plugin), use the sync command:
ionic cap sync
iOS
要构建 iOS 应用,你需要一台 Mac 计算机。
¥To build an iOS app, you’ll need a Mac computer.
Capacitor iOS 应用通过 Xcode(Apple 的 iOS/Mac IDE)进行配置和管理,依赖由 CocoaPods 管理。在 iOS 设备上运行此应用之前,需要完成几个步骤。
¥Capacitor iOS apps are configured and managed through Xcode (Apple’s iOS/Mac IDE), with dependencies managed by CocoaPods. Before running this app on an iOS device, there's a couple of steps to complete.
首先,运行 Capacitor open 命令,这会在 Xcode 中打开原生 iOS 项目:
¥First, run the Capacitor open command, which opens the native iOS project in Xcode:
ionic cap open ios
为了使某些原生插件正常工作,必须配置用户权限。在我们的照片库应用中,这包括相机插件:iOS 在第一次调用 Camera.getPhoto() 后自动显示模态对话框,提示用户允许应用使用相机。驱动此操作的权限被标记为“隐私” - 相机使用情况。” 要设置它,必须修改 Info.plist 文件 (更多详细信息请点击这里)。要访问它,请单击 "信息,",然后展开 "自定义 iOS 目标属性。"
¥In order for some native plugins to work, user permissions must be configured. In our photo gallery app, this includes the Camera plugin: iOS displays a modal dialog automatically after the first time that Camera.getPhoto() is called, prompting the user to allow the app to use the Camera. The permission that drives this is labeled “Privacy - Camera Usage.” To set it, the Info.plist file must be modified (more details here). To access it, click "Info," then expand "Custom iOS Target Properties."
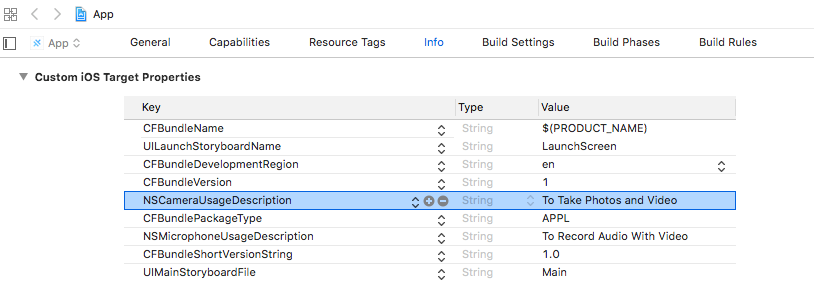
Info.plist 中的每个设置都有一个底层参数名称�和一个高级名称。默认情况下,属性列表编辑器显示高级名称,但切换到显示原始的底层名称通常很有用。为此,右键单击属性列表编辑器中的任意位置并切换 "原始键/值。"
¥Each setting in Info.plist has a low-level parameter name and a high-level name. By default, the property list editor shows the high-level names, but it's often useful to switch to showing the raw, low-level names. To do this, right-click anywhere in the property list editor and toggle "Raw Keys/Values."
添加 NSCameraUsageDescription 键并将值设置为描述应用需要使用相机的原因的内容,例如 "去拍照。" 当权限提示打开时,将向应用用户显示值字段。
¥Add the NSCameraUsageDescription Key and set the Value to something that describes why the app needs to use the camera, such as "To Take Photos." The Value field is displayed to the app user when the permission prompt opens.
按照相同的过程添加相机插件所需的其他两个密钥:NSPhotoLibraryAddUsageDescription 和 NSPhotoLibraryUsageDescription。
¥Follow the same process to add the other two Keys required of the Camera plugin: NSPhotoLibraryAddUsageDescription and NSPhotoLibraryUsageDescription.
接下来,单击左侧项目导航器中的 App,然后在 Signing & Capabilities 部分中选择你的开发团队。
¥Next, click on App in the Project Navigator on the left-hand side, then within the Signing & Capabilities section, select your Development Team.
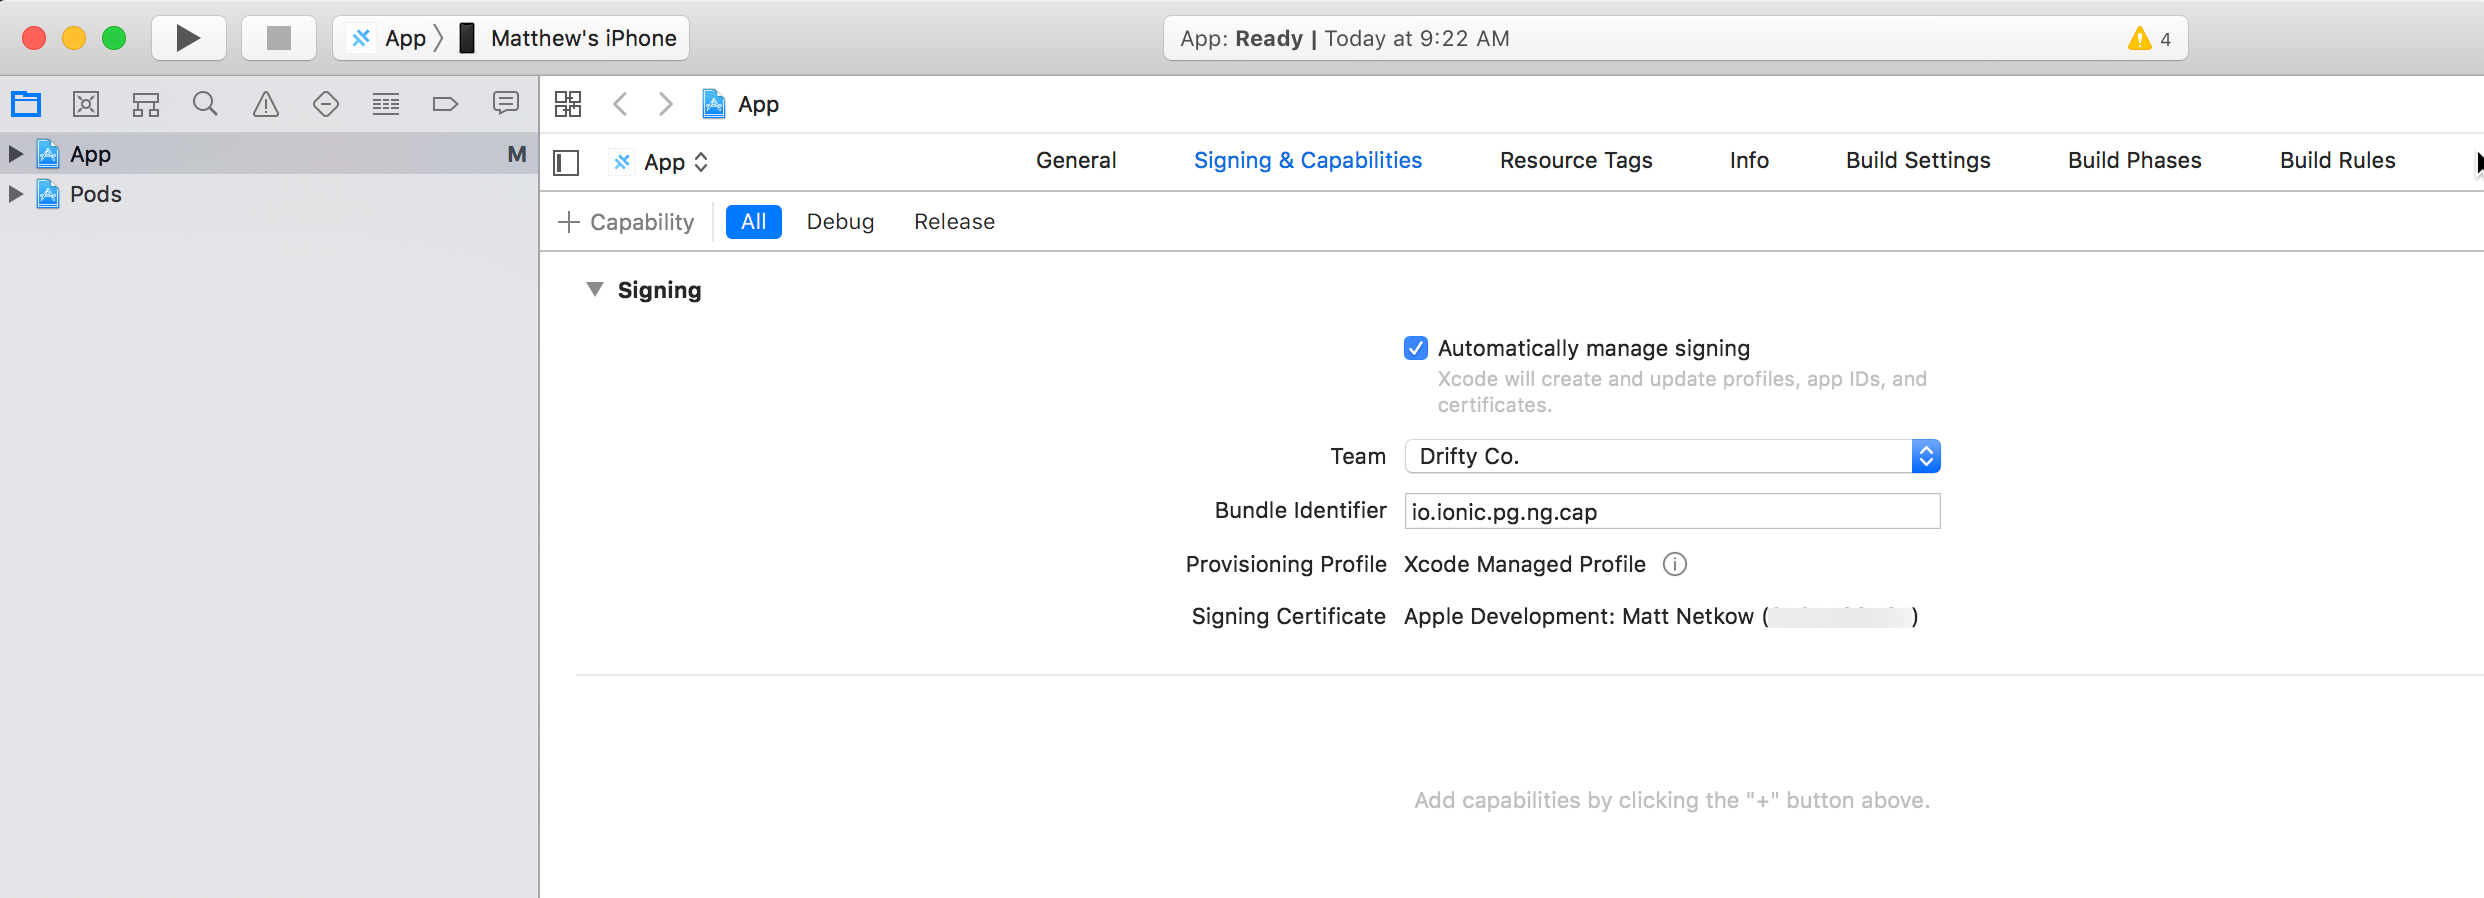
获得权限并选择开发团队后,我们就可以在真实设备上试用该应用了!将 iOS 设备连接到你的 Mac 计算机,选择它(对我来说是 App -> Matthew’s iPhone),然后单击 "构建" 按钮在你的设备上构建、安装和启动应用:
¥With permissions in place and Development Team selected, we are ready to try out the app on a real device! Connect an iOS device to your Mac computer, select it (App -> Matthew’s iPhone for me) then click the "Build" button to build, install, and launch the app on your device:

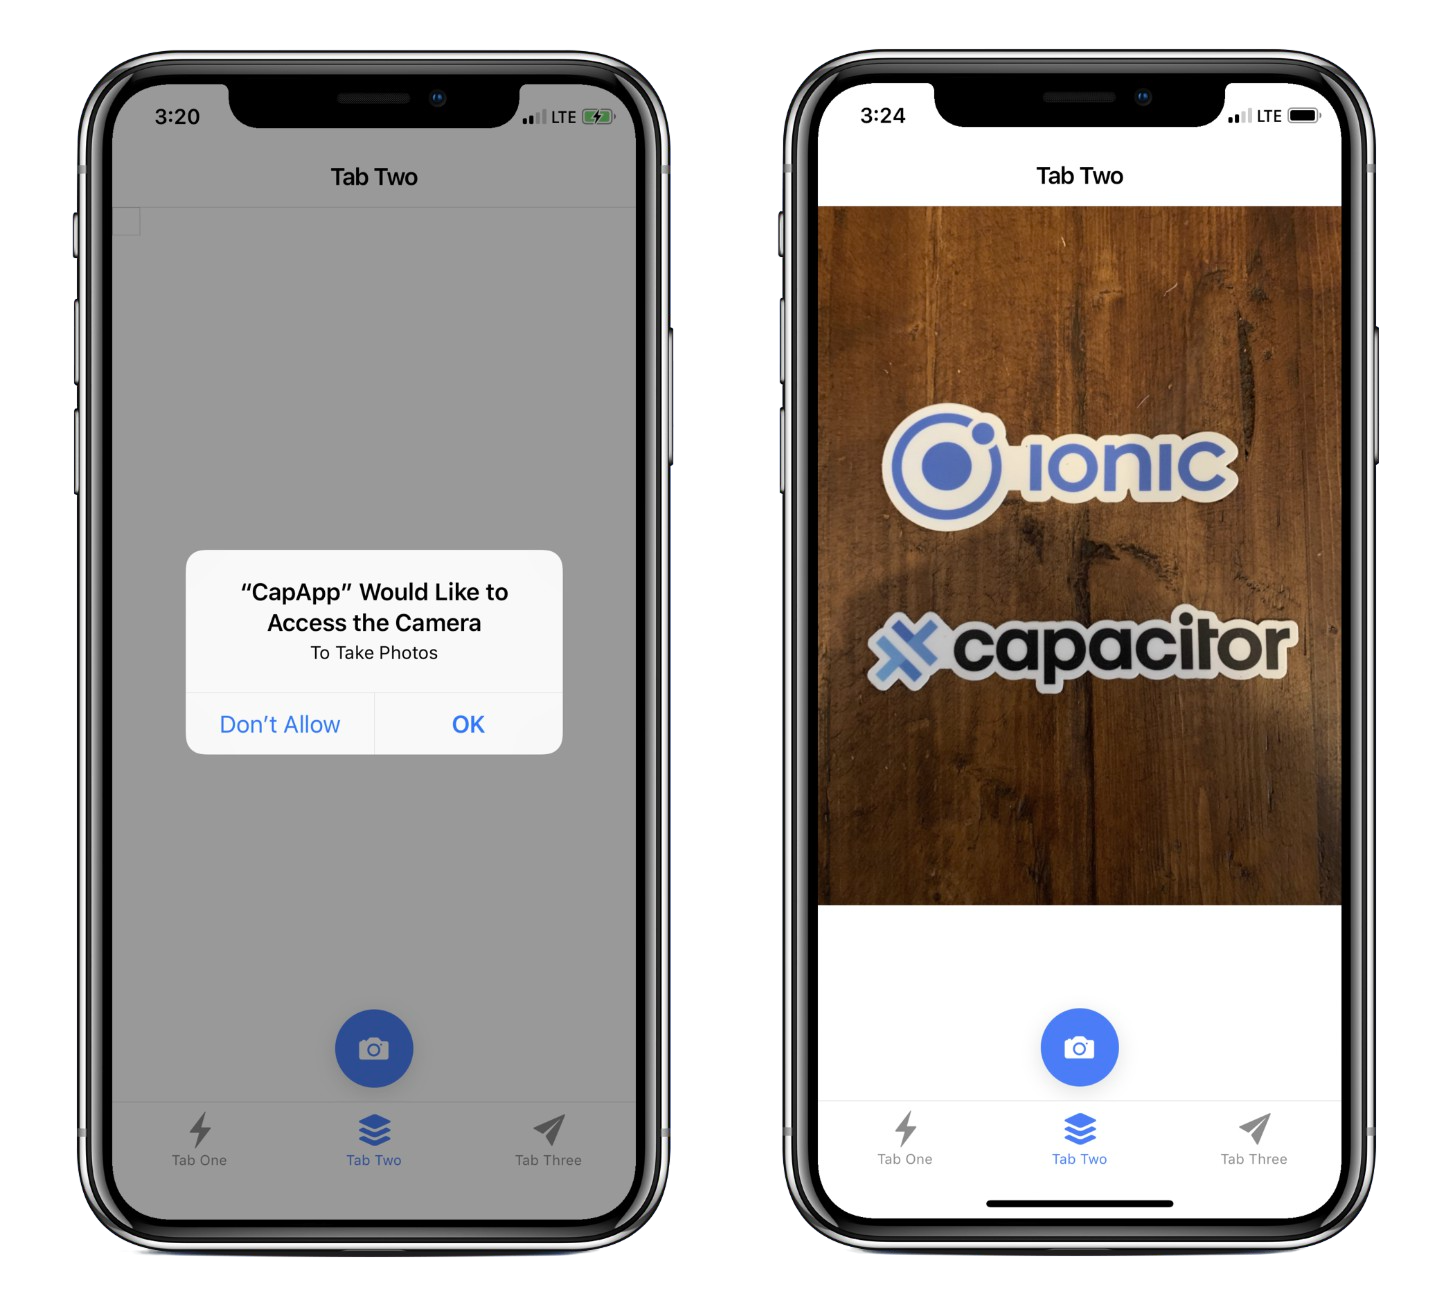
点击“照片库”选项卡上的“相机”按钮后,将显示权限提示。点击“确定”,然后用相机拍照。然后,照片就会显示在应用中!
¥Upon tapping the Camera button on the Photo Gallery tab, the permission prompt will display. Tap OK, then take a picture with the Camera. Afterward, the photo shows in the app!
安卓
¥Android
Capacitor Android 应用通过 Android Studio 进行配置和管理。在 Android 设备上运行此应用之前,需要完成几个步骤。
¥Capacitor Android apps are configured and managed through Android Studio. Before running this app on an Android device, there's a couple of steps to complete.
首先,运行 Capacitor open 命令,这会在 Android Studio 中打开原生 Android 项目:
¥First, run the Capacitor open command, which opens the native Android project in Android Studio:
ionic cap open android
与 iOS 类似,我们必须启用正确的权限才能使用相机。在 AndroidManifest.xml 文件中配置这些。Android Studio 可能会自动打开此文件,但如果没有,请在 android/app/src/main/ 下找到它。
¥Similar to iOS, we must enable the correct permissions to use the Camera. Configure these in the AndroidManifest.xml file. Android Studio will likely open this file automatically, but in case it doesn't, locate it under android/app/src/main/.
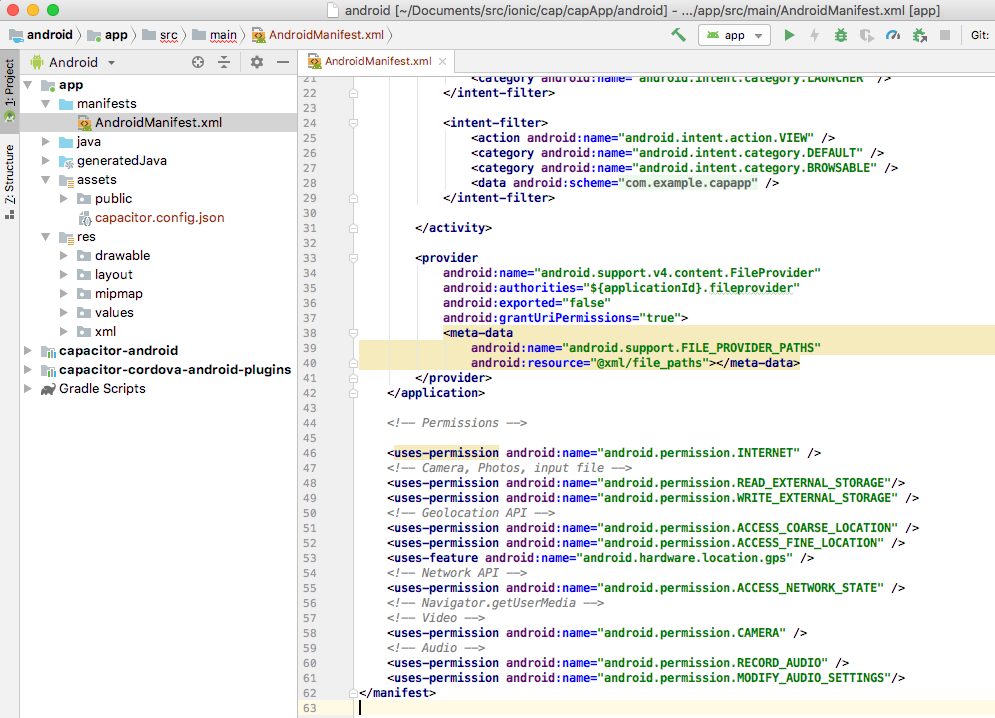
滚动到 Permissions 部分并确保包含以下条目:
¥Scroll to the Permissions section and ensure these entries are included:
<uses-permission android:name="android.permission.READ_EXTERNAL_STORAGE"/>
<uses-permission android:name="android.permission.WRITE_EXTERNAL_STORAGE" />
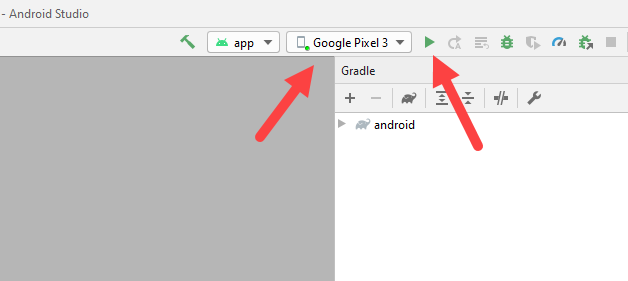
保存文件。获得权限后,我们就可以在真实设备上试用该应用了!将 Android 设备连接到你的计算机。在 Android Studio 中,单击 "运行" 按钮,选择连接的 Android 设备,然后单击确定以在你的设备上构建、安装和启动应用。
¥Save the file. With permissions in place, we are ready to try out the app on a real device! Connect an Android device to your computer. Within Android Studio, click the "Run" button, select the attached Android device, then click OK to build, install, and launch the app on your device.
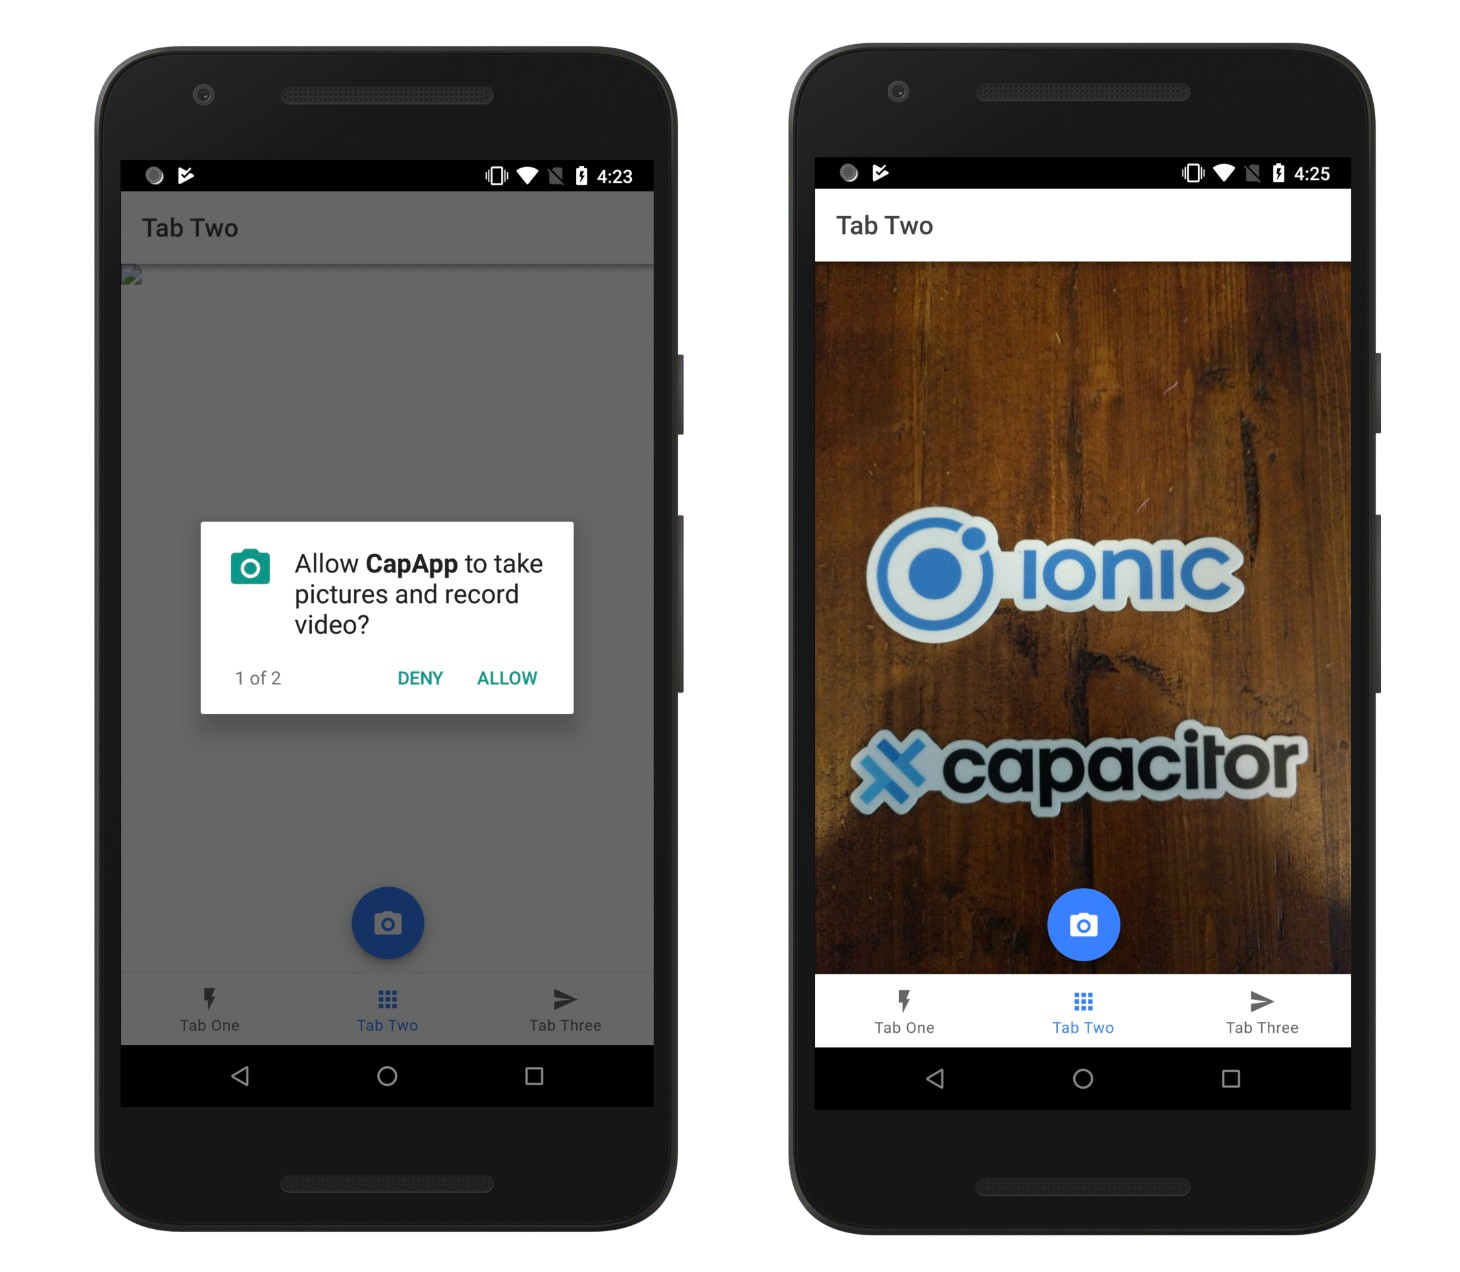
再次点击“照片库”选项卡上的“相机”按钮后,应显示权限提示。点击“确定”,然后用相机拍照。之后,照片应该会出现在应用中。
¥Once again, upon tapping the Camera button on the Photo Gallery tab, the permission prompt should be displayed. Tap OK, then take a picture with the Camera. Afterward, the photo should appear in the app.
我们的照片库应用刚刚部署到 Android 和 iOS 设备。🎉
¥Our Photo Gallery app has just been deployed to Android and iOS devices. 🎉
在本教程的最后部分,我们将使用 Ionic CLI 的 Live Reload 功能快速实现照片删除 - 从而完成我们的照片库功能。
¥In the final portion of this tutorial, we’ll use the Ionic CLI’s Live Reload functionality to quickly implement photo deletion - thus completing our Photo Gallery feature.